Chapter 6: Sound Ideas
Chapter 6: Sound Ideas
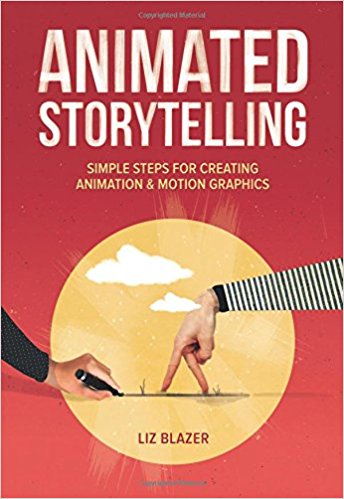
Chapter Six “Sound Ideas” was all about getting your audio and story in sync. It is important to not only have an amazing script for your animation, but also have music and sounds that work well with your animation. Chapter six started with a game of fill-in-the-blanks. It was a fun game that introduced me to the combinations and also possibilities of sound and visuals. Liz Blazer had us imagine what a specific visual sounded like. She used the example of lightning, a baby dropping his pacifier and Jay-Z strutting on stage. This made me recognize that sound is the result of an action and emerges out of an existing story. It is also notable that human emotions with sound can also create great impact.
I found the notion “Let sound lead your story.”, a very powerful statement. During my test stop motion animation I thought about the music and sounds I would choose after my stop motion animation filming was complete. It is now interesting to think I could have made decisions prior to filming based on the sounds that my objects would produce or the music that may work well with my storyline.
In production sound can be an afterthought. However, waiting to the middle or end of your animation can often be a mistake. When you are writing your production you should always be thinking about the sounds that your props make or what sound/music might sound good with them.
Here are some types of sounds,
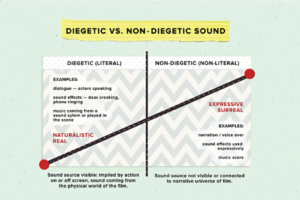
Diegetic Sound (Literal) – comes from sources that are visible on-screen (or implied by action off-screen) and that come from the physical world: a dog’s bark, a creaking door, most dialogue (that is not in the head of a character), and music whose source you can see in the scene—such as from a musician or a radio.
Examples – Dialog – Actors Speaking, Door creaking.
Non-Diegetic Sounds (Non-literal) – are sounds whose source neither is visible on the screen nor has been implied to be present in the action. Sound effects that are not natural to objects in the scene (a sad trombone playing “wah-wah-wah” when a character realizes they’ve been tricked), the music score (that is not coming from a musician or a radio in the scene), and any off-camera narration or dialogue that’s going on in the mind of a character.
Non-diegetic sound is surreal to the action and yet aims to enrich what is happening on-screen.
Example: Narrator, Voiceover, Sound Effects used Expressively, Music Score.
It is evident that sound alone can paint a vivid picture of action.

Chapter 7: Design Wonder
Chapter 7: Design Wonder
Chapter Seven “Design Wonder” was focused on world building and environmental design. Liz Blazer opens the chapter by stating, “Yes is yes, no matter how ridiculous an idea one player introduces into a comedic scene, the others must accept it as fact and even expand on its authenticity.” She then described an Improv comedy with a giant falling carrot to further explain what she meant by “expanding its authenticity”. She uses the giant falling carrot to show you that animation allows you to create any type of chaos you want.
Establishing a time and place for your animation is one of the best ways to make your animation feel authentic. After you establish a time and place the next step Liz explains is to to define the physical, social, and visual laws that exist there. This will help give your world a sense of authenticity and verisimilitude.
“Don’t just do it because it seems cool. Do it because it’s meaningful to the telling of your story.”
I really enjoyed reading the World’s Visual Law’s section on Motion Graphics and Branding. This section discussed the benefits of uniquely branding products, identities and logos in place of easily identifiable human or animal characters. She expresses that it is important to create distinct visual laws to capture your audience’s attention. By creating easily identifiable human or animal characters is one way in doing so.
Design Wonderland Recap

Animation Inspiration
Stop Motion Animation: Inspiration
During this module I explored different storylines, color themes and mediums. I was particularly interested in using paper as my stop motion animation medium. I did a lot of research on stop motion animations that used paper or materials similar to paper such as cardboard and card stock. The amazing thing about paper is that although it is flat you can bend it to create 3d sculptures. I also found several stop motion animations out of clay. The clay stop motion animations inspired me to bend paper into objects similar to what was being done with clay.
Most of the inspiration for this module I found online and Instagram. Instagram was extremely useful since it allowed me to search for specific hashtags. For an example I was able to see the top posts within the hashtag #papermotion. This allowed me to find well executed stop motion animations and also be specific for what I was looking for.
#1 Stop Motion - Effective Audio - “Legos on the Beach”
I really enjoyed coming across this stop motion animation. It has inspired me to think closely about the sounds produced with the actions in my stop motion animation as well as the music. It is evident that Melissa (@BricksontheLoose) uses ambient audio sounds to evoke strong emotions through vivid imagery in her stop motion animation. You can tell that the Melissa took in a count every sound that would be produced by the actions of her lego figures. My favorite part in Melissa’s stop motion animation was when her lego man ate the green apple on the beach (28 Seconds). The crunching apple sound effect worked perfectly with her action and also was timed right when the apple touched the lego mans lips. I also thought It was helpful that the artist provided information where she uploaded her music and sound effects from. You can check out findsounds.com for sound effects similar to Melissa’s.
#2 Stop Motion - Effective Audio - “Bluetacks Animation”
For my second inspirational effective use of audio, I wanted to find a good example of a stop motion animation with ambient audio (Audio that gives a sense of place). During my readings this Module I was particularly interested in ambient audio. It seemed to be a great way to give your animation a more realistic appearance. I came across a lot of lego stop motion animations using this effect, however wanted to find something different. That is when I came across “Blutacks”. Yes, Andrew Minor’s stop motion animation is almost entirely made out of Blutack. He shot his stop motion animation with a Panasonic Lumix GF-1 using a tripod and edited it in Corel VideoStudio. Andrew has a nice title screen to introduce you to his animation. He also uses a number of sounds of musics that give you a sense of place.
#1 Stop Motion - Effective Text Animation - “Transforming Dots to Letters”
This After Effects tutorial by Evan Abrams is very insightful. In his tutorial he shows and explains how you can transform dots into lines, letters or really any other shape. He starts with dots and then transforms them into lines. From there he then makes his lines into letters. (Actually, Spoilers, it just looks like that.) What I found interesting is that his pre-production is completed in illustrator. This is where he maps out his project before executing in After Effects. The process he explained in Illustrator seemed to very simple, for any illustrator level to pick up. If you are interested Evan allows his fans to download his After Effect files here.
#2 Stop Motion - Effective Text Animation - “3-Dimensional Triangular Text Animation”
I came across my this text animation on YouTube, after typing in “Triangle animation intro title”. My favorite part about this text animation is the use of shapes transforming into introduction letters. The beginning of the text animation shows three-dimensional triangles fly into the screen. Once they start to fall to they begin to become 2d (flat/non-three dimensional). Once all triangles have all fallen they create a logo called “Alpine Rafting”. found it was interesting that Zooba Network created this text animation in Animation AEX7. Animation AEX7 was a program I am not familiar with or have heard about. To check out more of Zooba Network’s work you can go here. Zooba’s team creates, Product/Service Promo Videos, Logo Openers, 3D/2D Logo Intro/Outro Animations, Title Animations, Explainer Videos, Whiteboard Animations, Logo Designs, Website Design & Developments, Full Corporate Brand Designing.
Stop Motion Animation - (Linear)
Banana & Peanut Butter - Stop Motion Animation
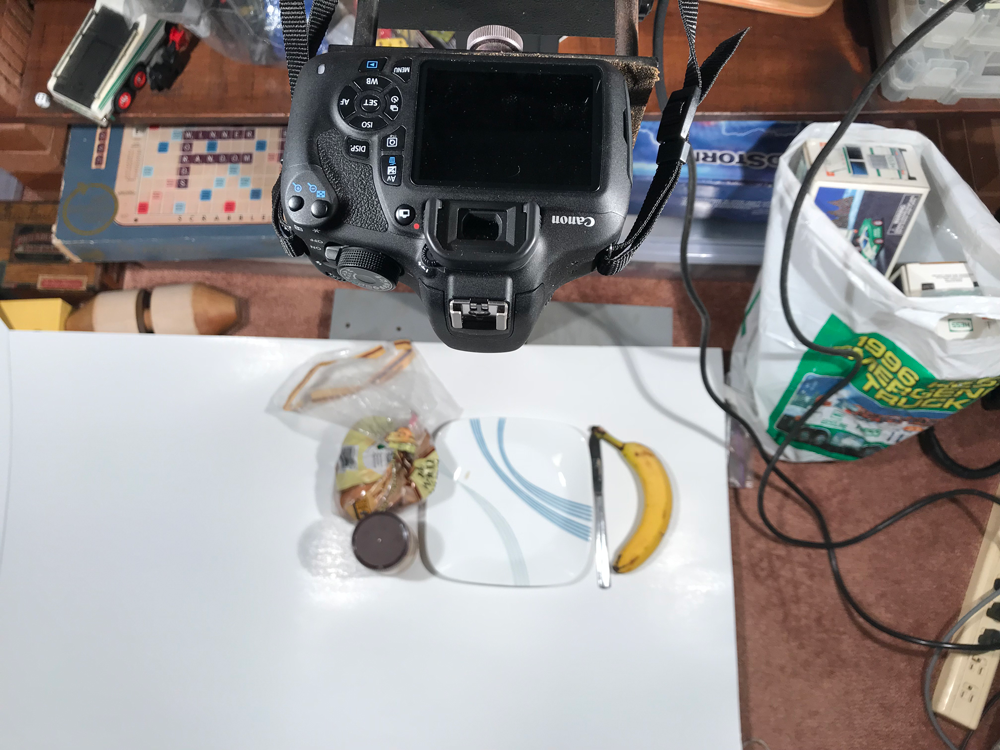
I had a lot of fun with my linear stop motion animation. Creating my storyline and storyboard prior to starting my animation allowed me to brainstorm fresh ideas and execute a project focusing on the beginning, middle and end sequences. I chose to make a peanut butter and banana sandwich for my stop motion animation, because the plot would be flexible and my favorite thing to eat is a banana peanut butter sandwich.

The Challenge:
It was challenging not to move the plate, peanut butter jar and banana slices on my set by a mistake. I found during my test stop motion animation that it was very easy to accidentally bump into elements or mistake the last position of the shot. It became helpful to preview my photos during my shoot in this case. What I found helped me was moving the banana slices with a tooth pick and lightly marking where the items would end with a pencil. When it came time to edit my photos the pencil marks vanished immediately when I increased the exposure of my animation.
One if my favorite parts of this assignment was adding the sound effects. After reading Chapter 5 on Sound Ideas, I had a much better idea how to use and apply sound effects on my stop motion animation. The inspirational videos I found on YouTube gave me great recommendations to find sound effects for free online.
Sound Effects:
I felt that the sound effects would work best with my Peanut Butter and Banana animation since there were many objects involved in my storyline. (Peanut butter jar, plate, knife, bread bag etc.) The materials that produced noises matched great with the sound effects I found online. (www.freesound.org/) It made my animation stronger and more enjoyable to watch. It was a lot of fun searching for these sounds. When it came time to add them into my animation it was important that they were precise. What helped me the most was zooming into my timeline and using the clip trimmer. This allowed me to align my sound effects closer to the start or end of an action.
Lighting:
The camera ring my grandmother allowed me to borrow had two lights connected to it. I played around with the direction of the lights on my grandmothers rig as well as the height of the rig with my camera on it. I ended up keeping the rig at a similar height that I used for my test animation. At first I positioned my lights off the wall as Professor Golden recommended, to give my objects a softer shadow. However, after playing around with the soft shadows and hard shadows I decided to give my objects harder shadows for a more bolder dramatic look.

Stop Motion Animation - (Non-linear)
#2 - Stop Motion Animation (Non-linear)
For my second animation I wanted to combine my low polygon animals with paper stop motion animation. After conducting research on stop motion animation techniques and completing our readings I had a better idea of how I would complete my animation. Prior to completing this project I had many ideas, however have come to the conclusion that less is sometimes more.
I decided to recreate my low polygon killer whale after the site I have been publishing my work to, orcajourneys.com. Killer whales are magnificent creatures that have unique color patterns. It was important to me that I represented my whale in as few colors as possible while contrasting something realistic.
The Challenge:
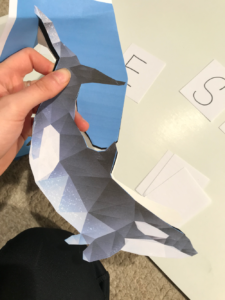
The challenge with this one was very similar to my Banana and Peanut Butter stop motion. I had to be very careful to not move any of the orcas triangles by mistake. I used a toothpick to move the triangles together and apart. When it came time to move triangles from my orca it was a lot easier to construction/deconstruction my orca with a toothpick and rotate the pieces with my hands.
Lighting:
Lighting was tricky especially since I was using colored paper. I wanted to provide enough light to eliminate any distracting shadows and make sure the blue hue of my paper did not not wash out in the light. Since my paper triangles were flat having hard shadows was surprisingly more effective than soft shadows. The shadows under my paper stoped hard, rather than extend out. The shadows of the triangles were directly under the paper. Further more, the “hard shadow” method seemed to “outline” my triangles making them bolder and more defined over my cyan paper.
Colors:
I started by printing my digital orca low polygon design. I cut out triangles to reconstruct the whale with 4 colors, black, gray, white, and blue. It was difficult matching the identical size and number of triangles from my digital design. So, I ended up cutting a black piece of paper first that outlined the whale. I then began to cut the whale into triangles.
Process:
Once I finished cutting out all my triangles I placed them on a flat clean surface. Originally, I thought I would need to bring one triangle in at a time to build the whale again for this stop motion animation. Boy, was I wrong. After watching Melissa’s YouTube video I had a better idea how to start and end my animation. Instead of recreating the whale I took triangles away from the whale. This helped tremendously, since I didn’t have to remember where each individual triangle belonged during production.
After I shot each frame I uploaded my photos into photoshop. To save time I imported the photos as frames. I then added filters and increased the saturation to color fix the photos I took. It was nice not having to manipulate this project as much as I did with the previous cinemagraphs I created, but I still needed to touch up the photos coloring quite a bit. It was evident that Photoshop was a great tool to use for editing stop motion animations.
Music:
For my orca stop motion I wanted to use friendly/calming music to evoke curiosity. I also wanted tell the Non-liner “Puzzle” format storyline with music/sound effects that would not reveal what the triangles would create in my storyline. At first I dabbled in orca and ocean sound effects on freesounds.com. Since this was a Non-linear “Puzzle” format storyline, I decided to stay away from sound effects being placed at the beginning of my animation. I moved the orca noise I had at the beginning of my clip to the end and added music to my timeline. This song kept my audience in the dark about what the triangles were creating and had a nice calming tone to it that I think captures the whale well.

Test Animation
Test Animation (Testing 1, 2, 3)
